
How to Create a Web2 Account
Creating a WeSendit® Web2 account is your first step towards seamless and secure file transfers. When you register, you'll automatically begin a free 14-day trial of our Starter plan, giving you access to premium features right away.
Follow these simple steps to get set up:
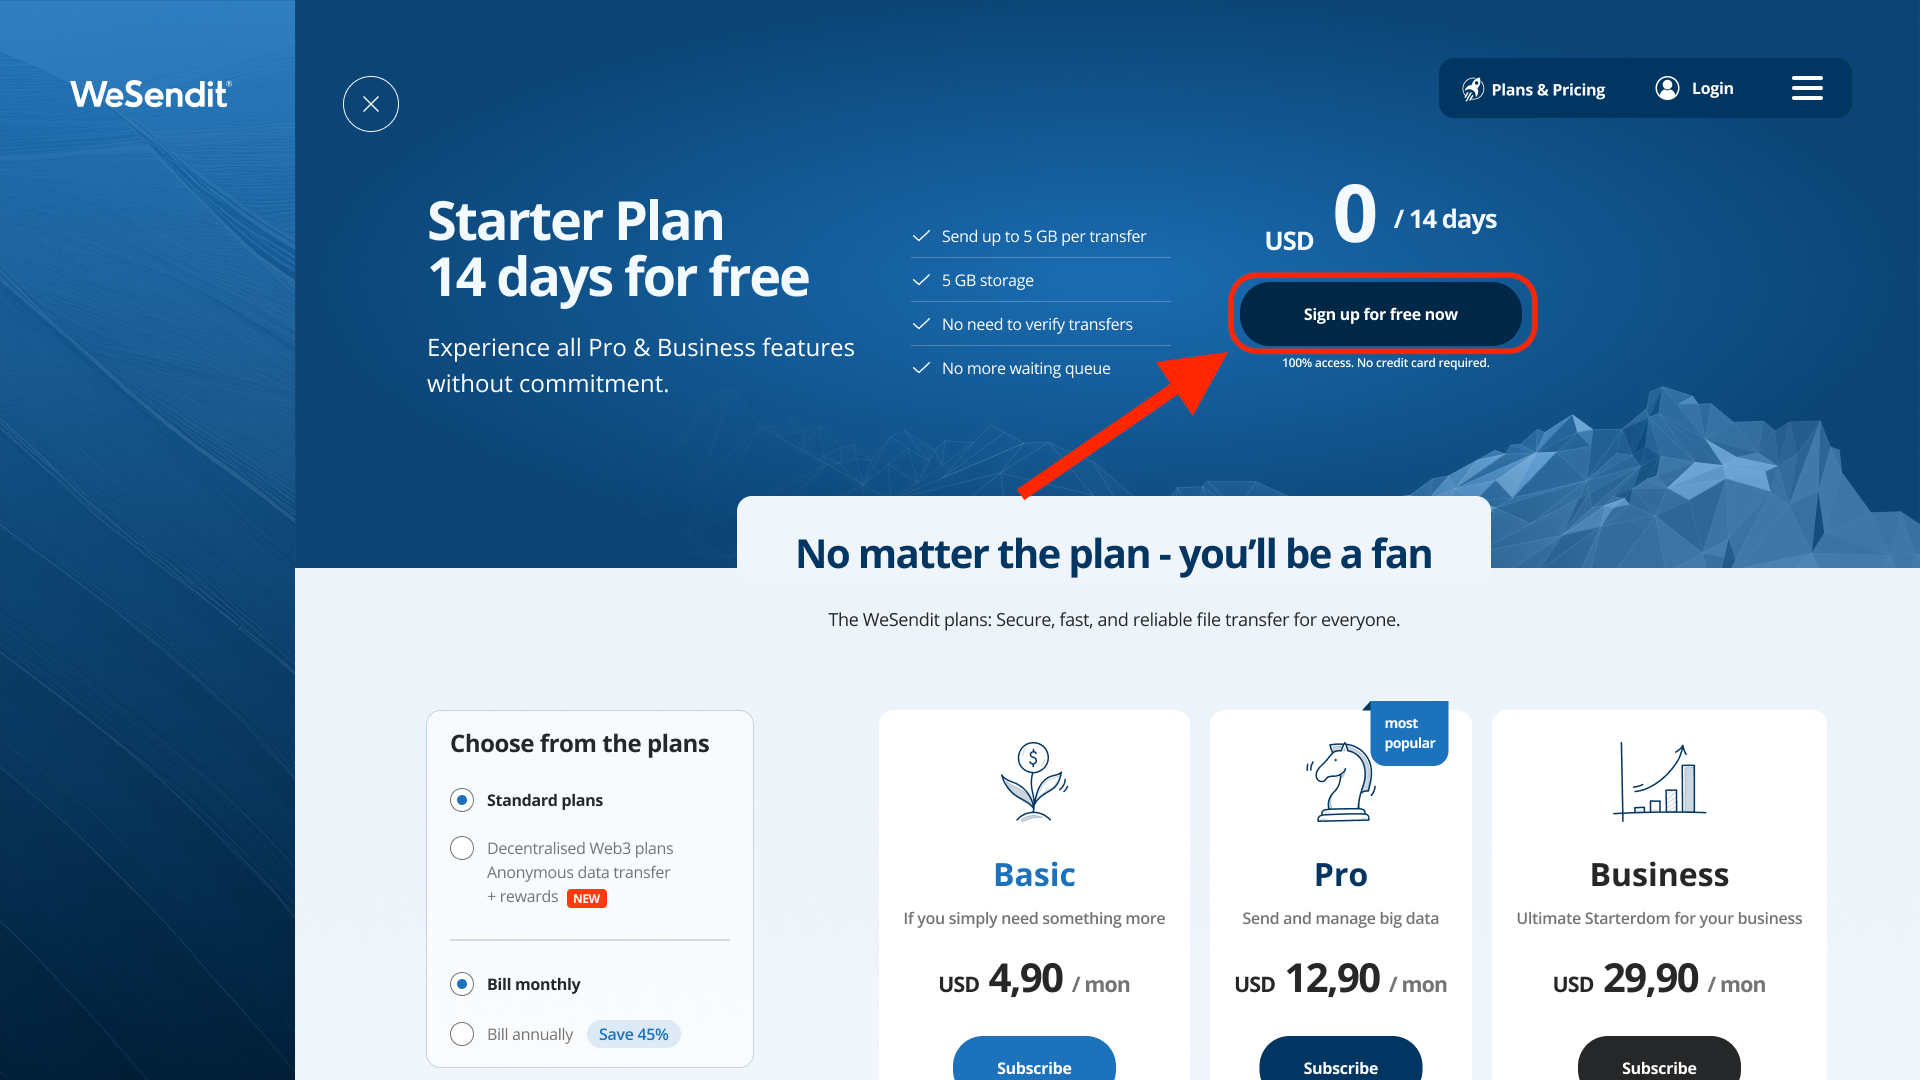
1. Go to the Registration Page
Navigate to the WeSendit® homepage and click on the "Sign Up" or "Create Account" button to begin the process.
2. Fill in Your Details
On the registration form, you'll be asked to provide your name and additonal information such as:
Your Email Address: Make sure this is a valid email you have access to, as you'll need it for verification.
A Secure Password: Choose a strong, unique password for your account's security.
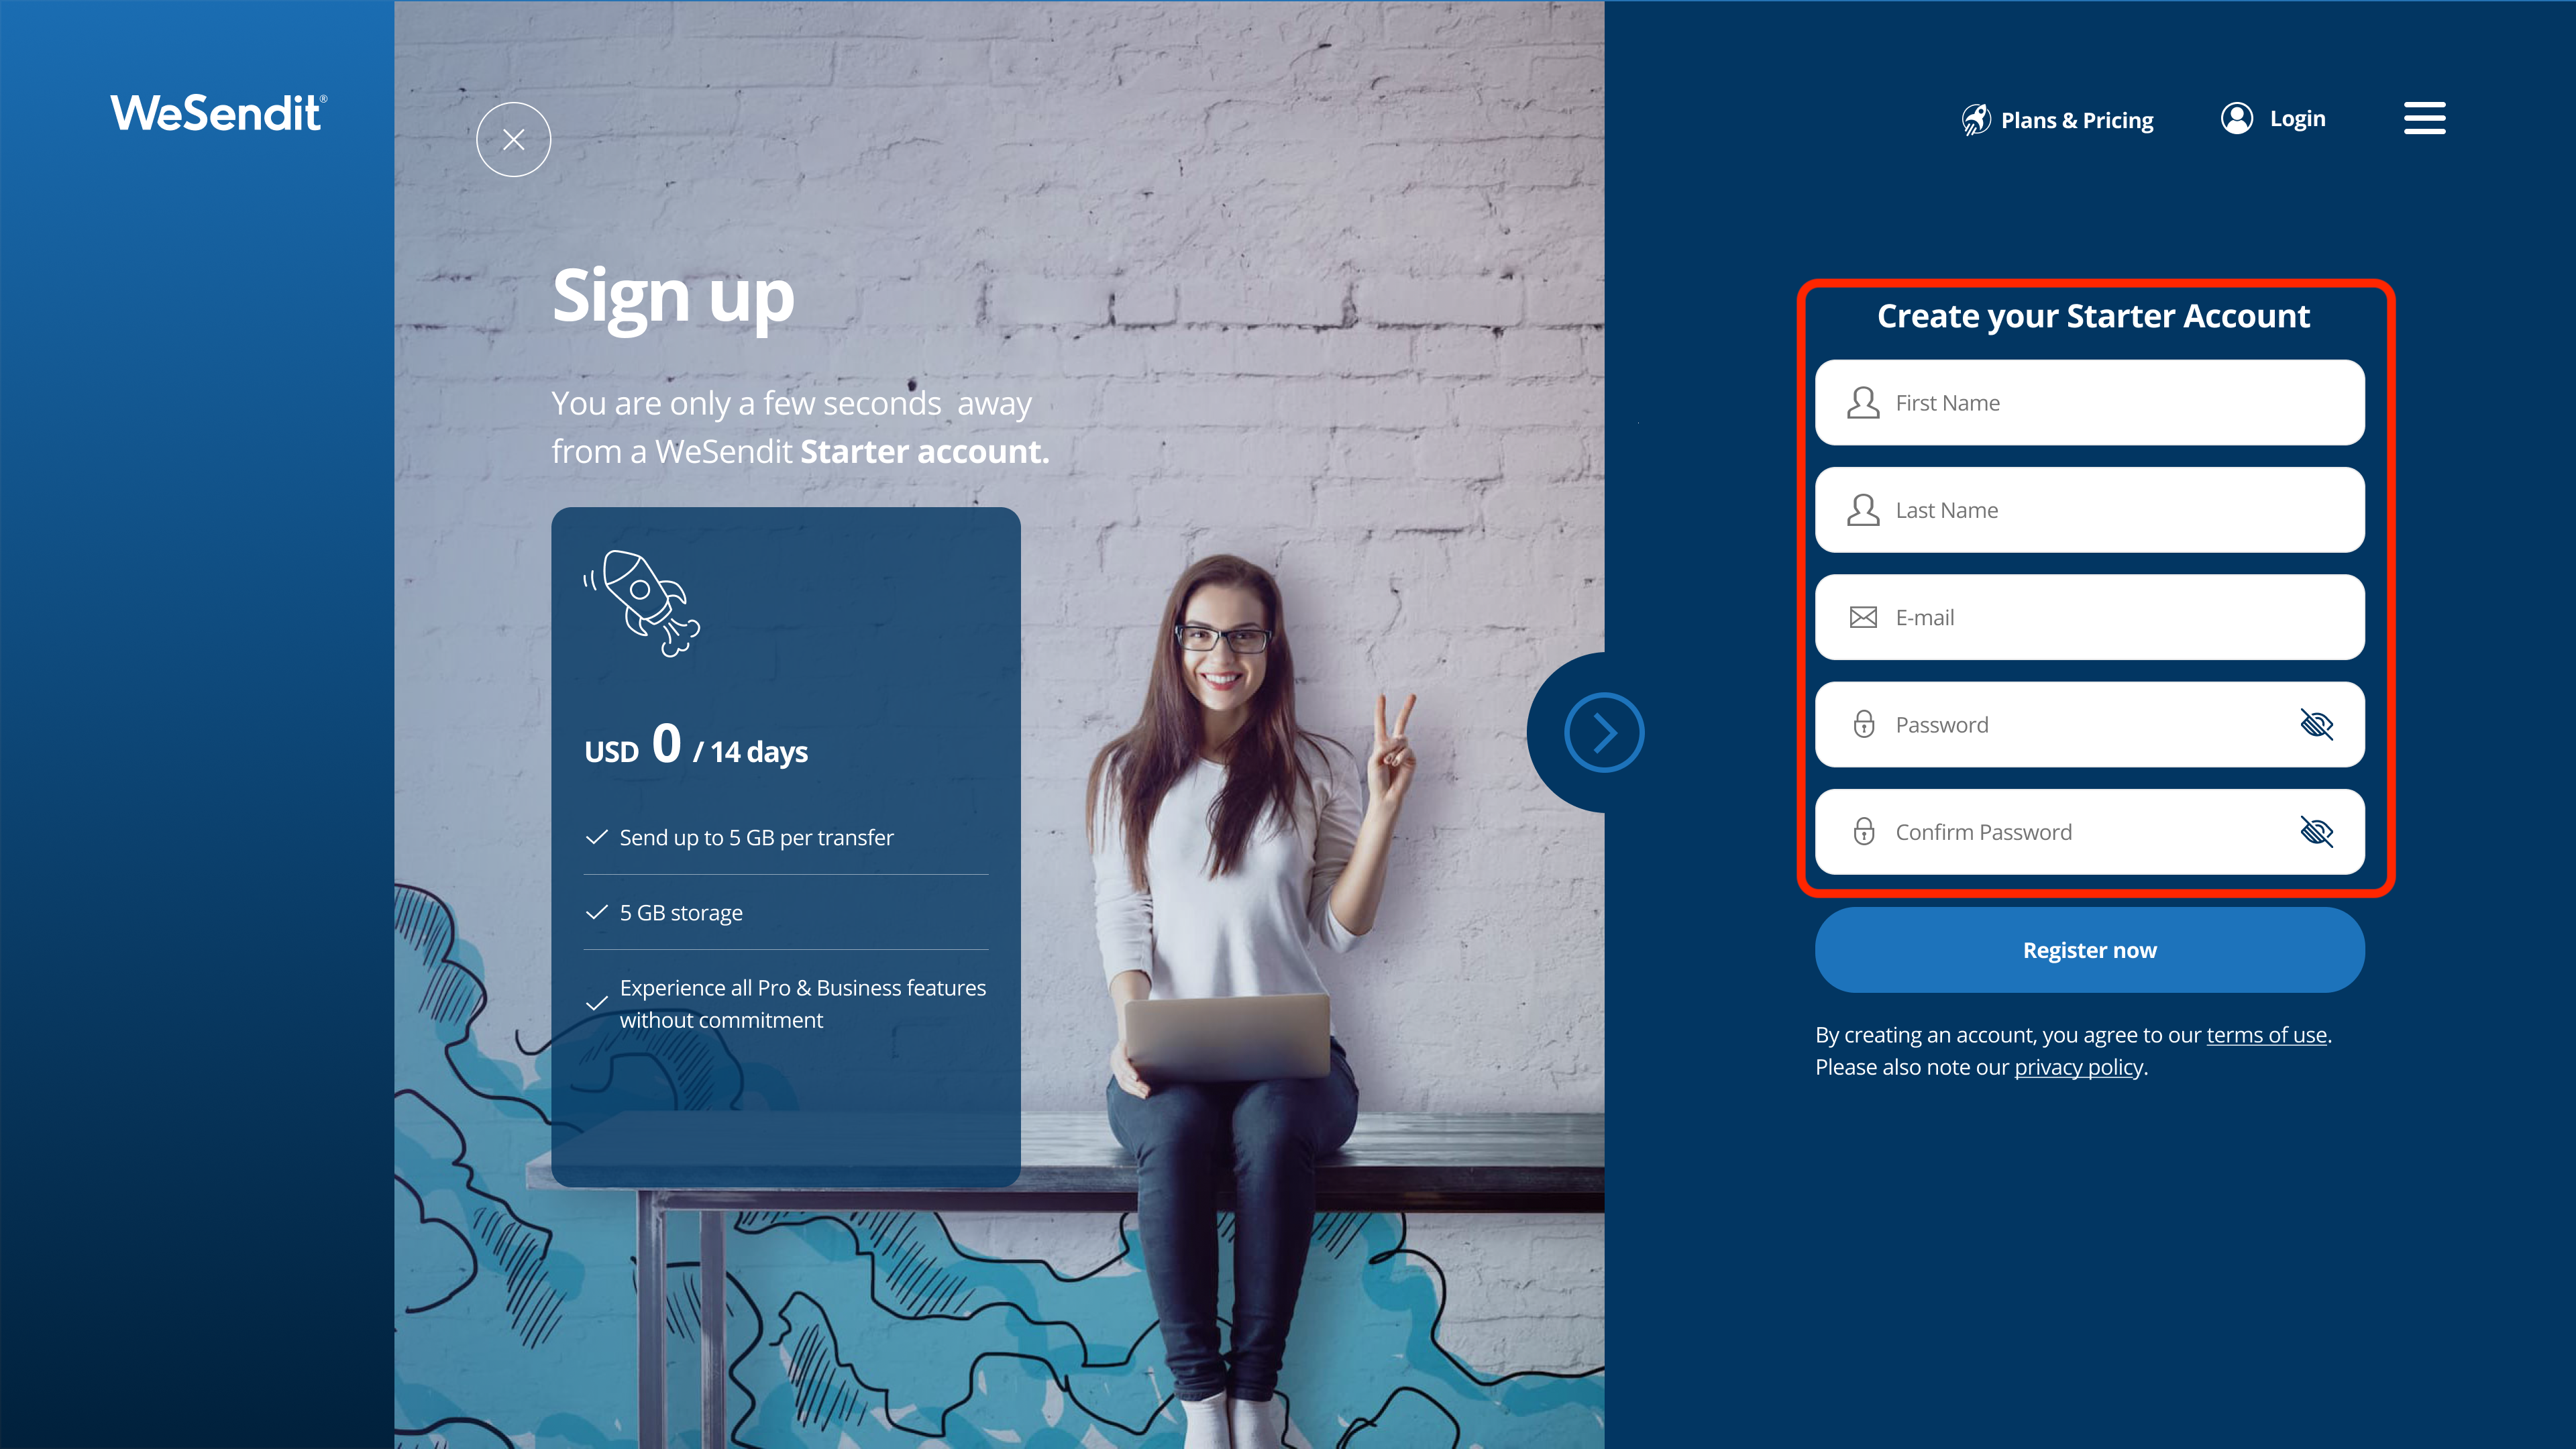
3. Create Your Account
Click the "Register now" button to submit your information.
4. Agree to the Terms
By creating an account, you agree to our terms of us.
5. Verify Your Email Address
We will immediately send a verification email to the address you provided.
Open the email from WeSendit® (check your spam or junk folder if you don't see it).
Copy the confirmation code inside.
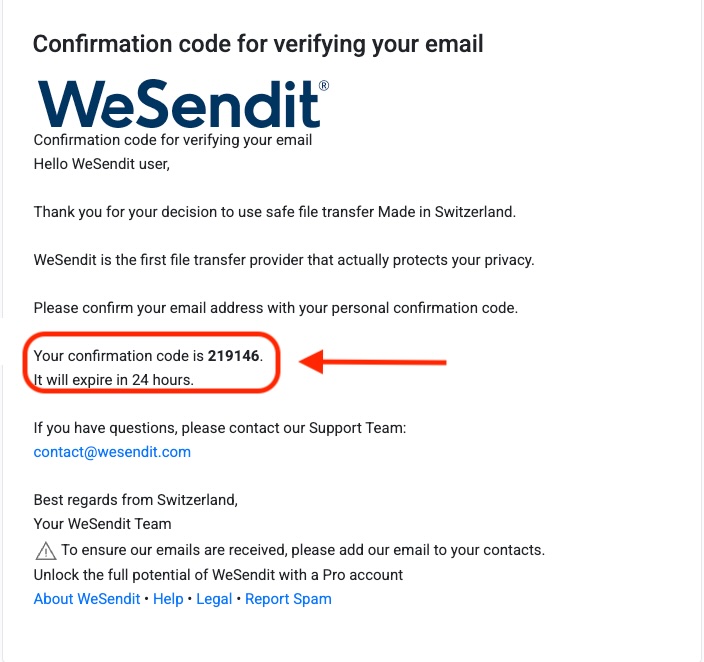
Once you have copied the code, simply enter it to be forwarded to your new WeSendit dashboard.
Still have questions?
Feeling a bit overwhelmed? That’s completely normal especially in the beginning. If anything remains unclear after browsing our Help Center, don’t hesitate to reach out. Our support team is always here to help you.