
Web 2 vs. Web 3: Which WeSendit® Plan is Right for You?
1. The Main Difference: Centralized vs. Decentralized
Before making a decision, it is important to understand the two approaches:
Web 2 (Standard Plans):
These are the classic plans (Starter, Basic, Pro, Business) based on proven, centralized technology. Payment can easily be made via credit card or PayPal (payment options).
Web 3 (Decentralized Plans):
These plans use blockchain technology to provide full data control, maximum anonymity, and decentralized storage. Usage and payment are handled exclusively via the WSI token and a crypto wallet.
2. Your Benefits at a Glance
Benefits of Web 2 Plans:
- Simplicity: No crypto knowledge required.
- Flexibility: Payment using traditional (fiat) currencies.
- Centralized Management: Ideal for teams that prefer familiar interfaces.
Benefits of Web 3 Plans:
- WSI Rewards: Earn tokens through activities or referrals.
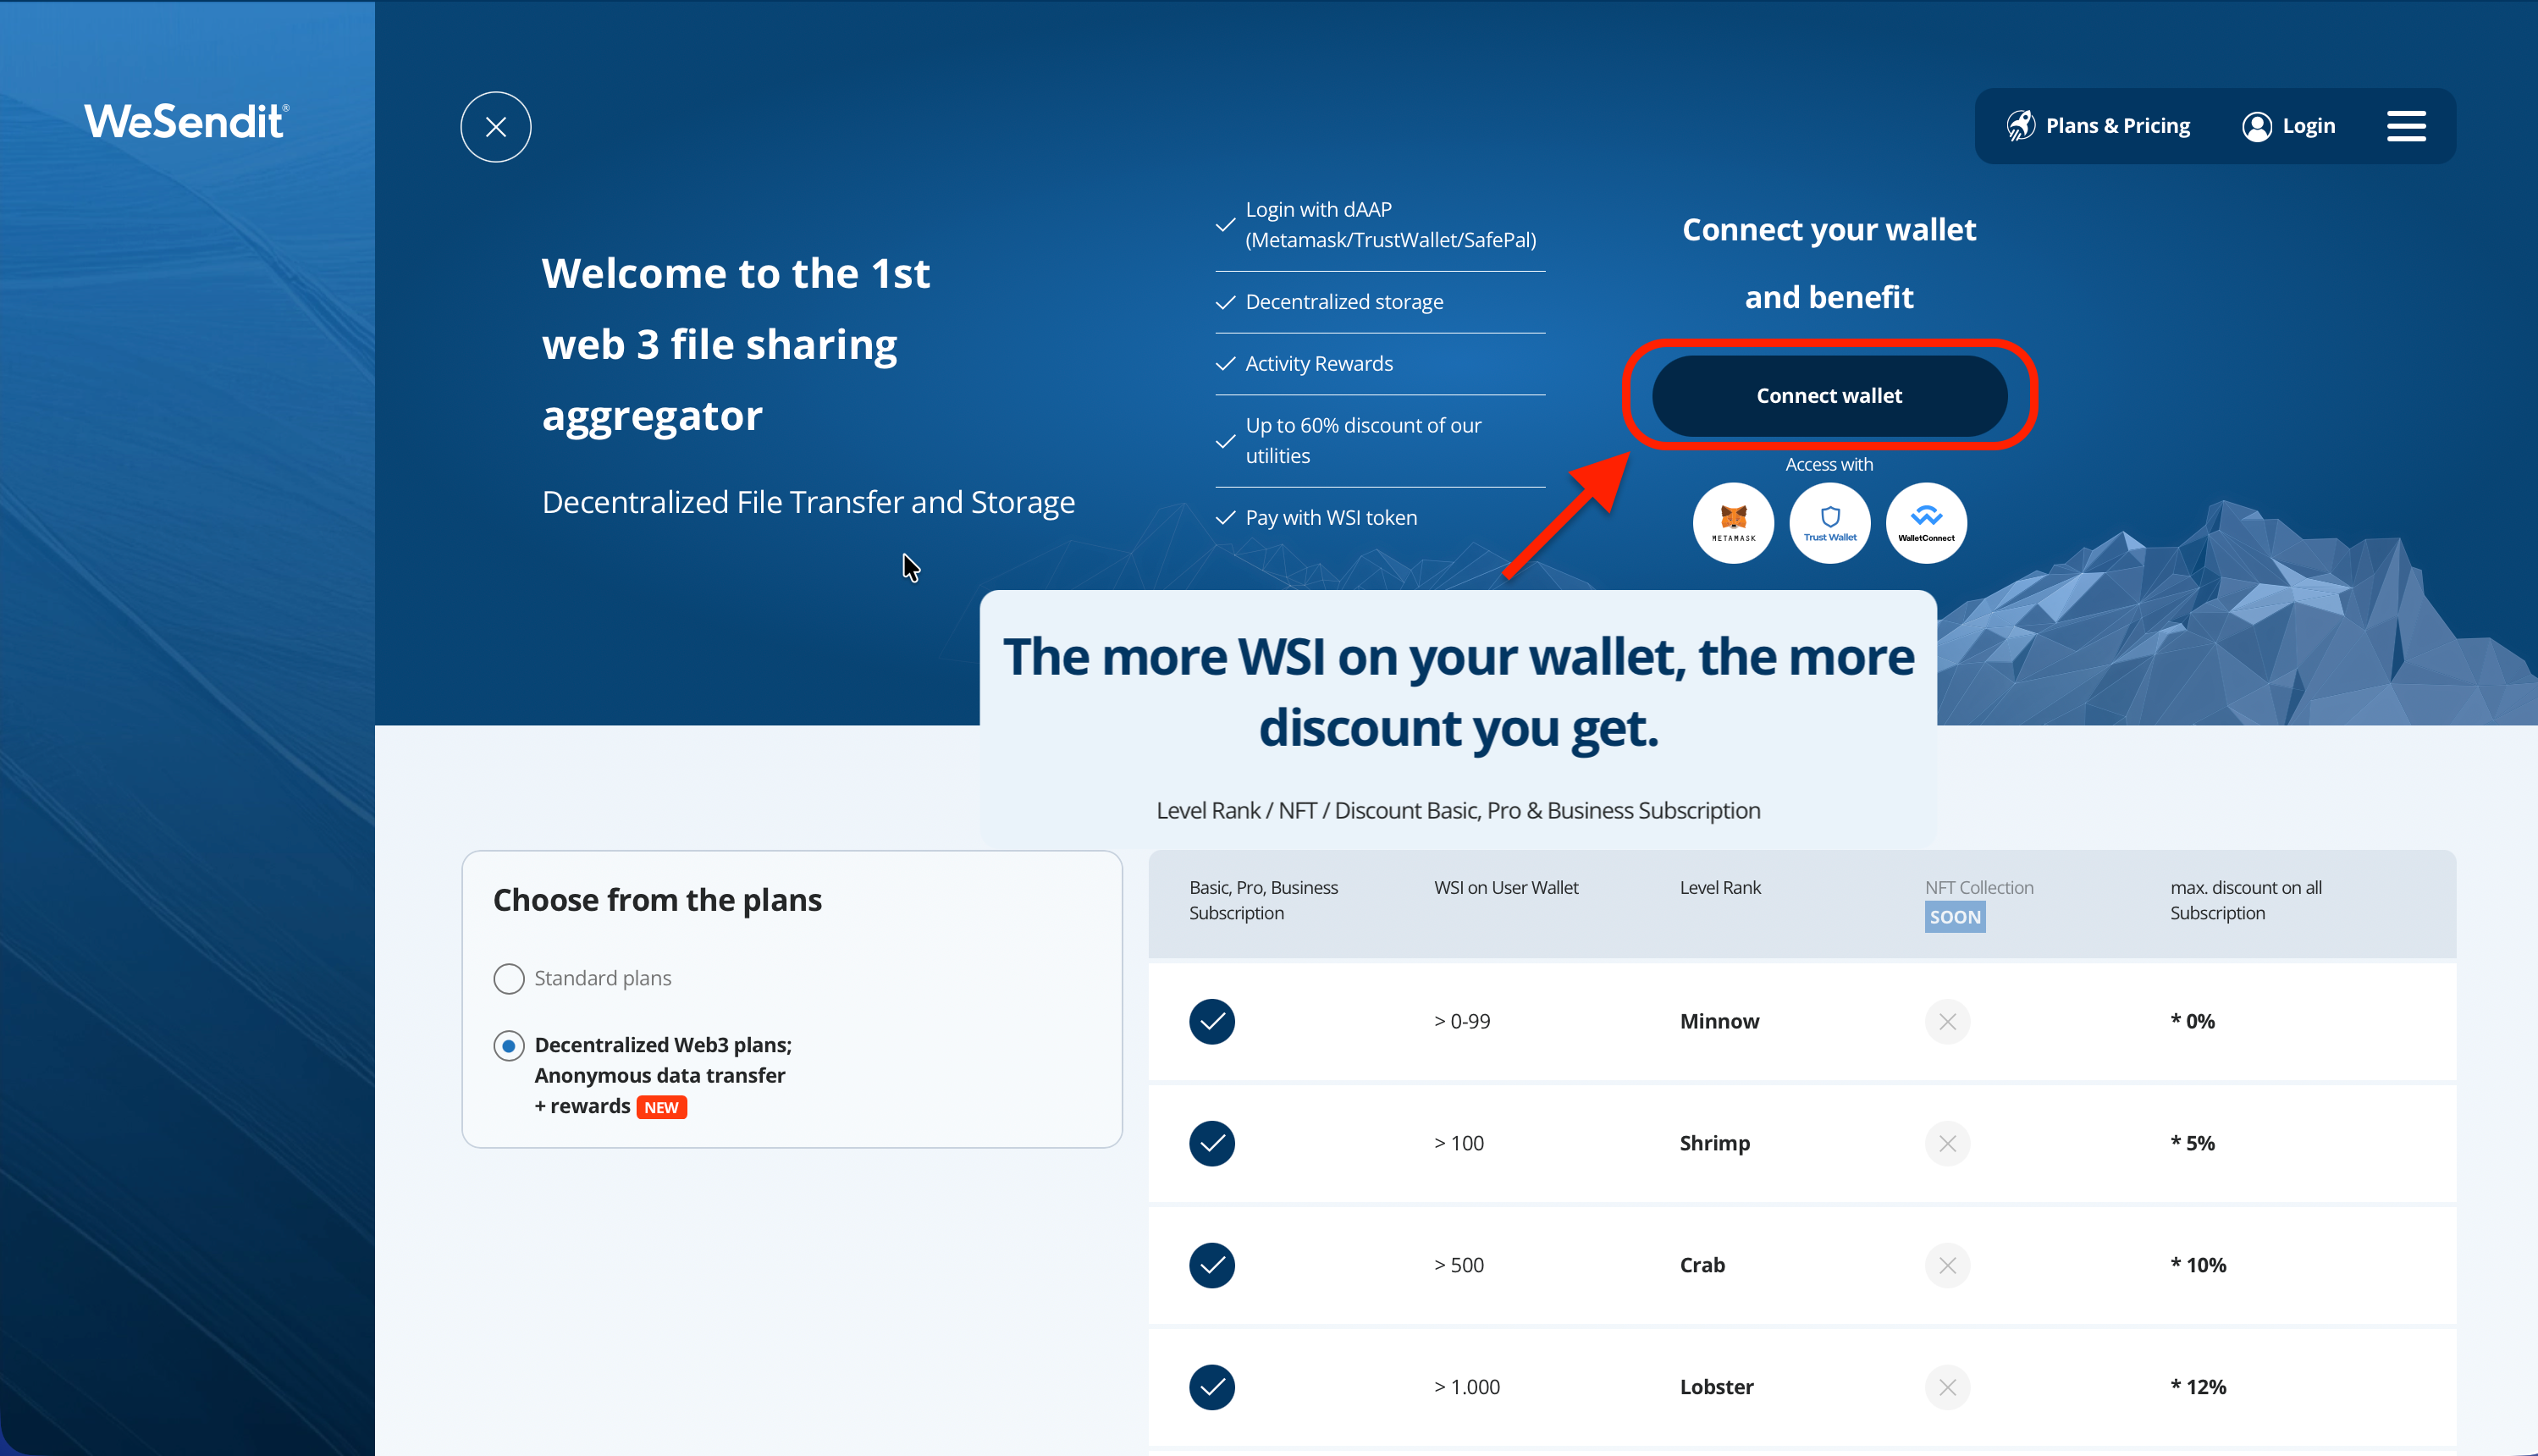
- Significant Discounts: Get up to 60% off subscriptions, depending on your level rank (number of WSI tokens held).
- Security & Anonymity: Decentralized storage on secure nodes and login only via wallet for maximum data protection.
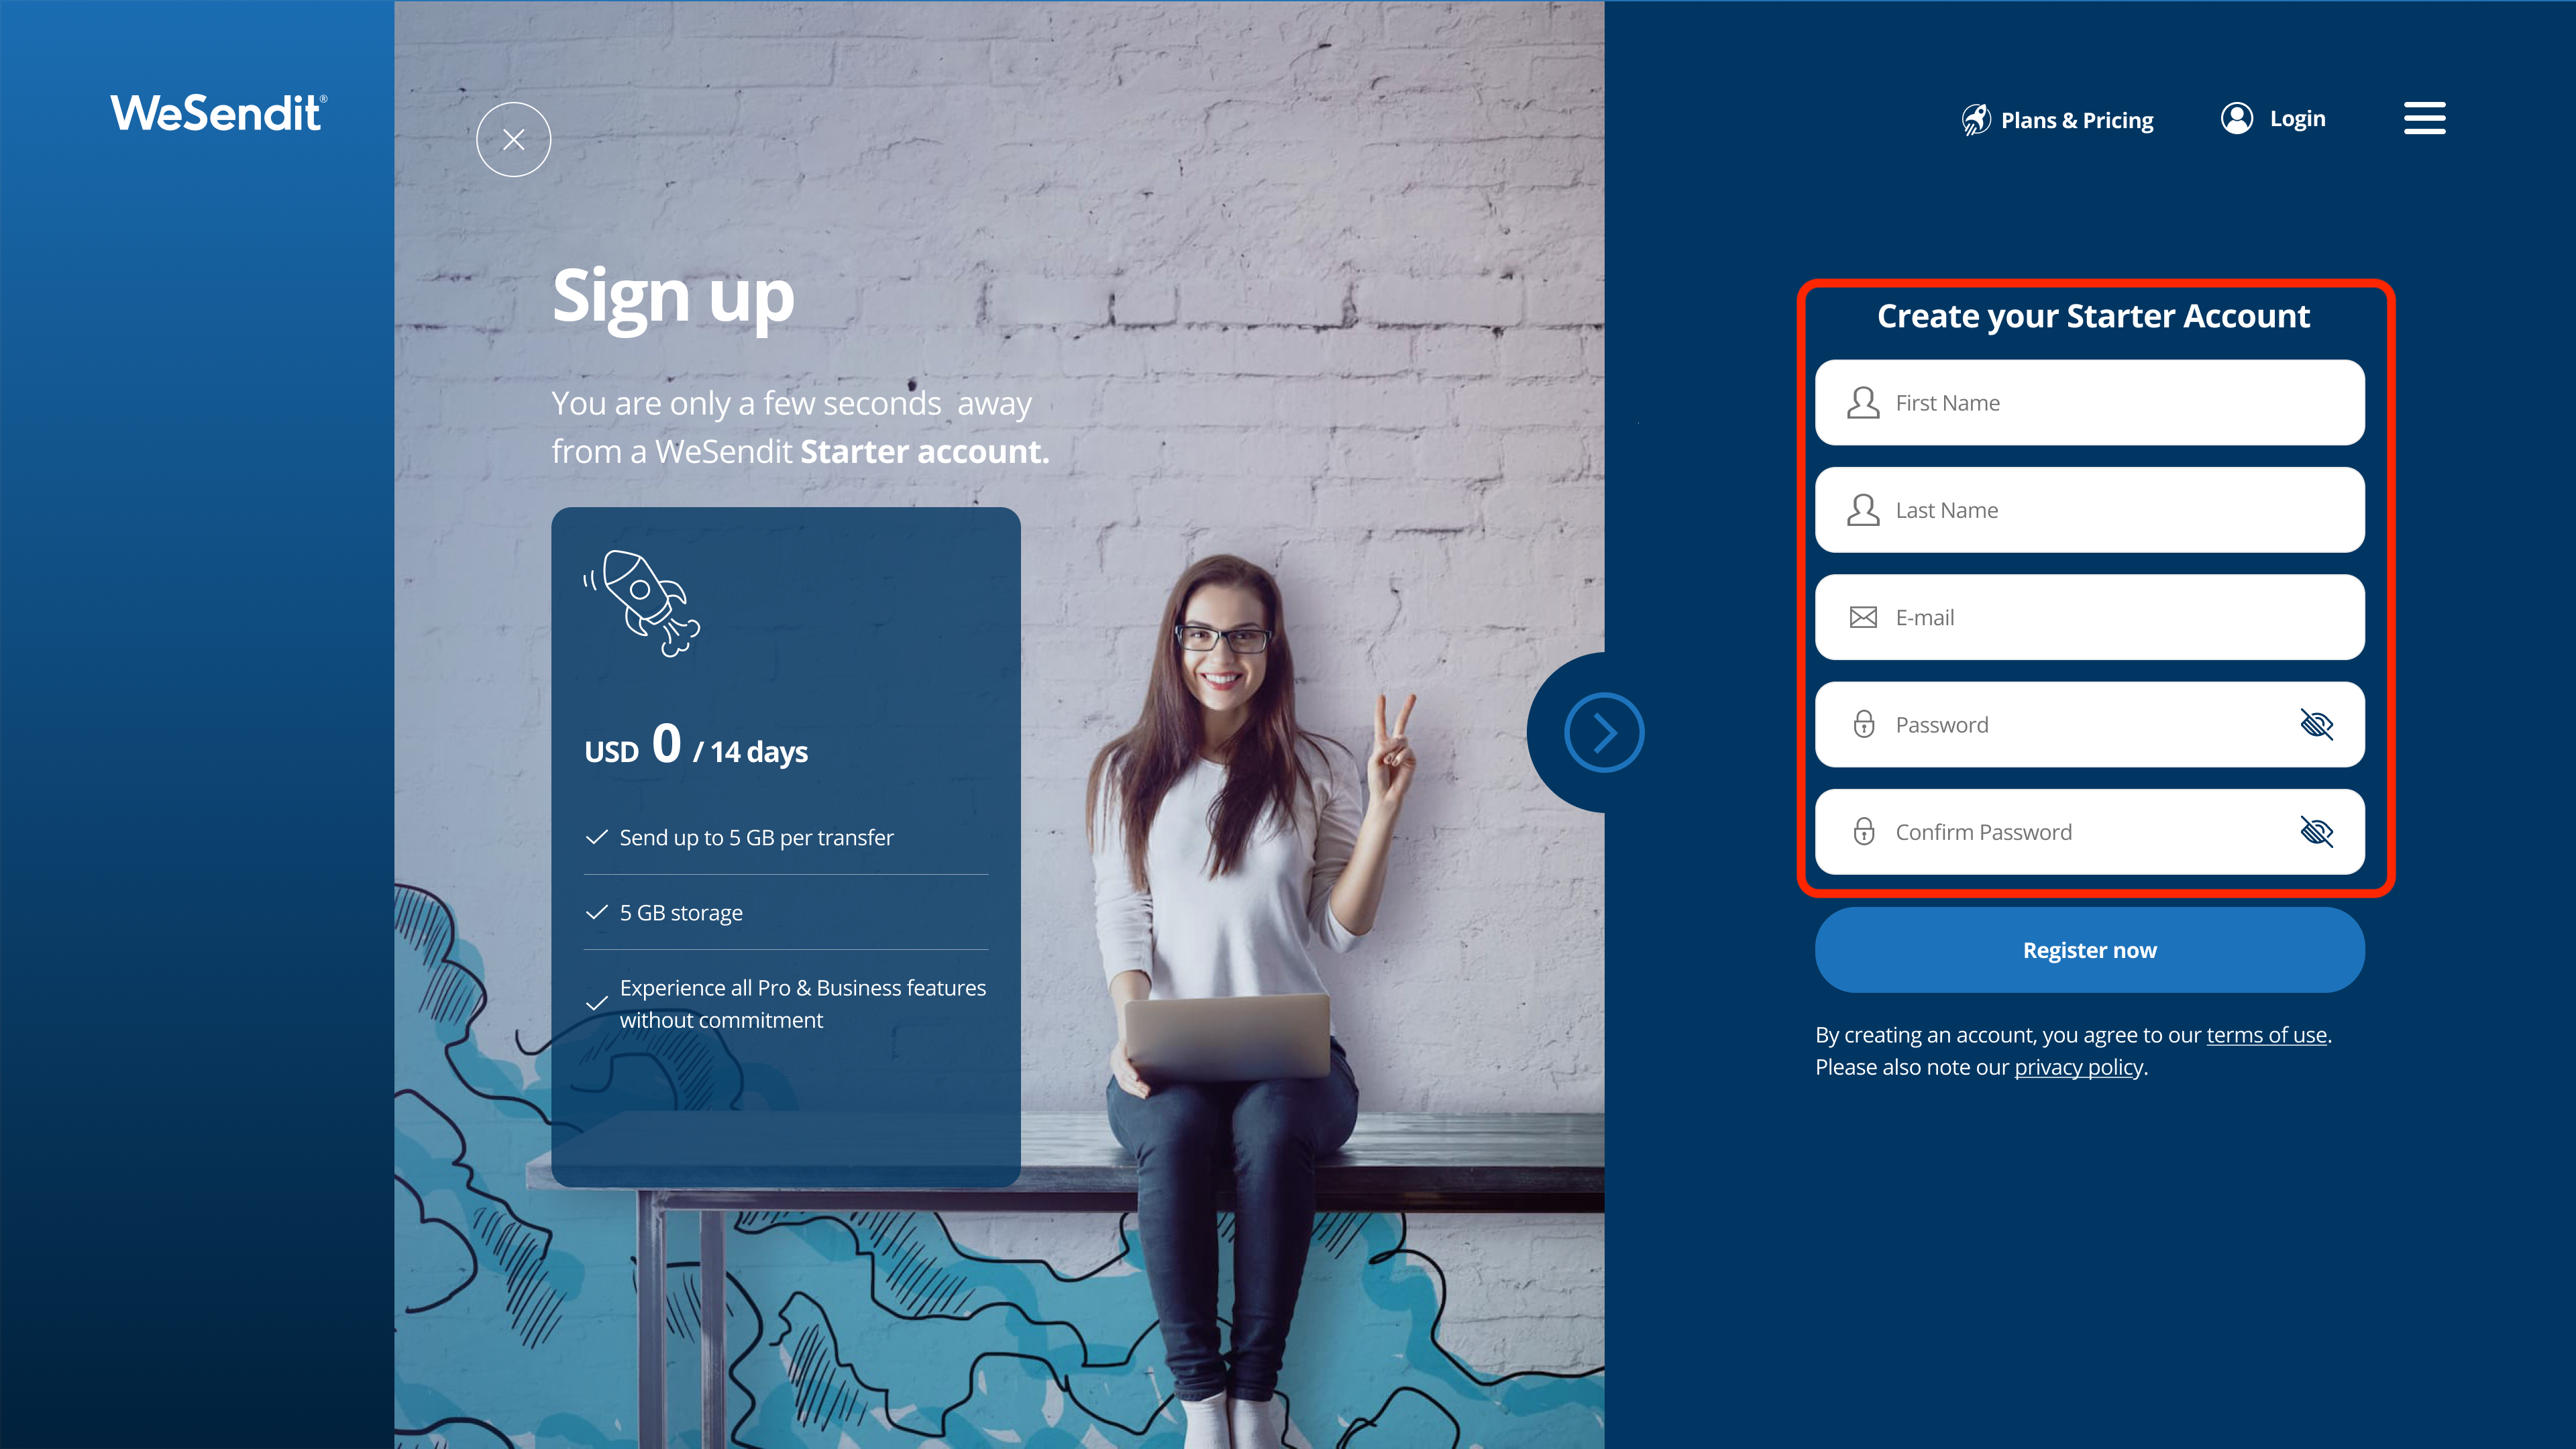
3. Step-by-Step Guide: Web 2 Registration
If you want to use the classic features, proceed as follows:
- Visit the “Plans & Pricing” page and make sure the toggle is set to Standard plans.
- Choose your desired plan (e.g. Pro or Business) and click the corresponding button.
- On the “Sign up” page, enter your name, email address, and a secure password.
- Enter the 6-digit verification code you received via email.
- Complete the booking on the payment page by entering your billing details and selecting a payment method (credit card or PayPal).
4. Step-by-Step Guide: Web 3 Registration
To use the decentralized benefits, you will need a crypto wallet (e.g. MetaMask):
- On the “Plans & Pricing” page, select Decentralized Web3 plans.
- Click the Connect Wallet button.
- In the modal window, choose your wallet provider (e.g. MetaMask or WalletConnect) and confirm the connection in your wallet app.
- Make sure you have at least 1 WSI token in your wallet to activate the plan.
- Select your plan and confirm the WSI token transaction in your wallet.
- After confirmation, you will be redirected to the success page and can start immediately.
Still have questions?
Feeling a bit overwhelmed? That’s completely normal especially in the beginning. If anything remains unclear after browsing our Help Center, don’t hesitate to reach out. Our support team is always here to help you.