
Getting Started with WeSendit®: Creating & Upgrading Your Starter Account
Your Benefits in the Starter Plan
The Starter plan is your ticket to the world of WeSendit®. It works as a 14-day free trial that lets you use the following features immediately:
- 5 GB storage for your cloud.
- 5 GB transfer limit for sending files.
- Security features like password-protected transfers.
- No risk: The trial ends automatically, with no hidden costs.
Step-by-Step: Creating a Starter Account
Follow this guide to set up your account in less than 2 minutes.
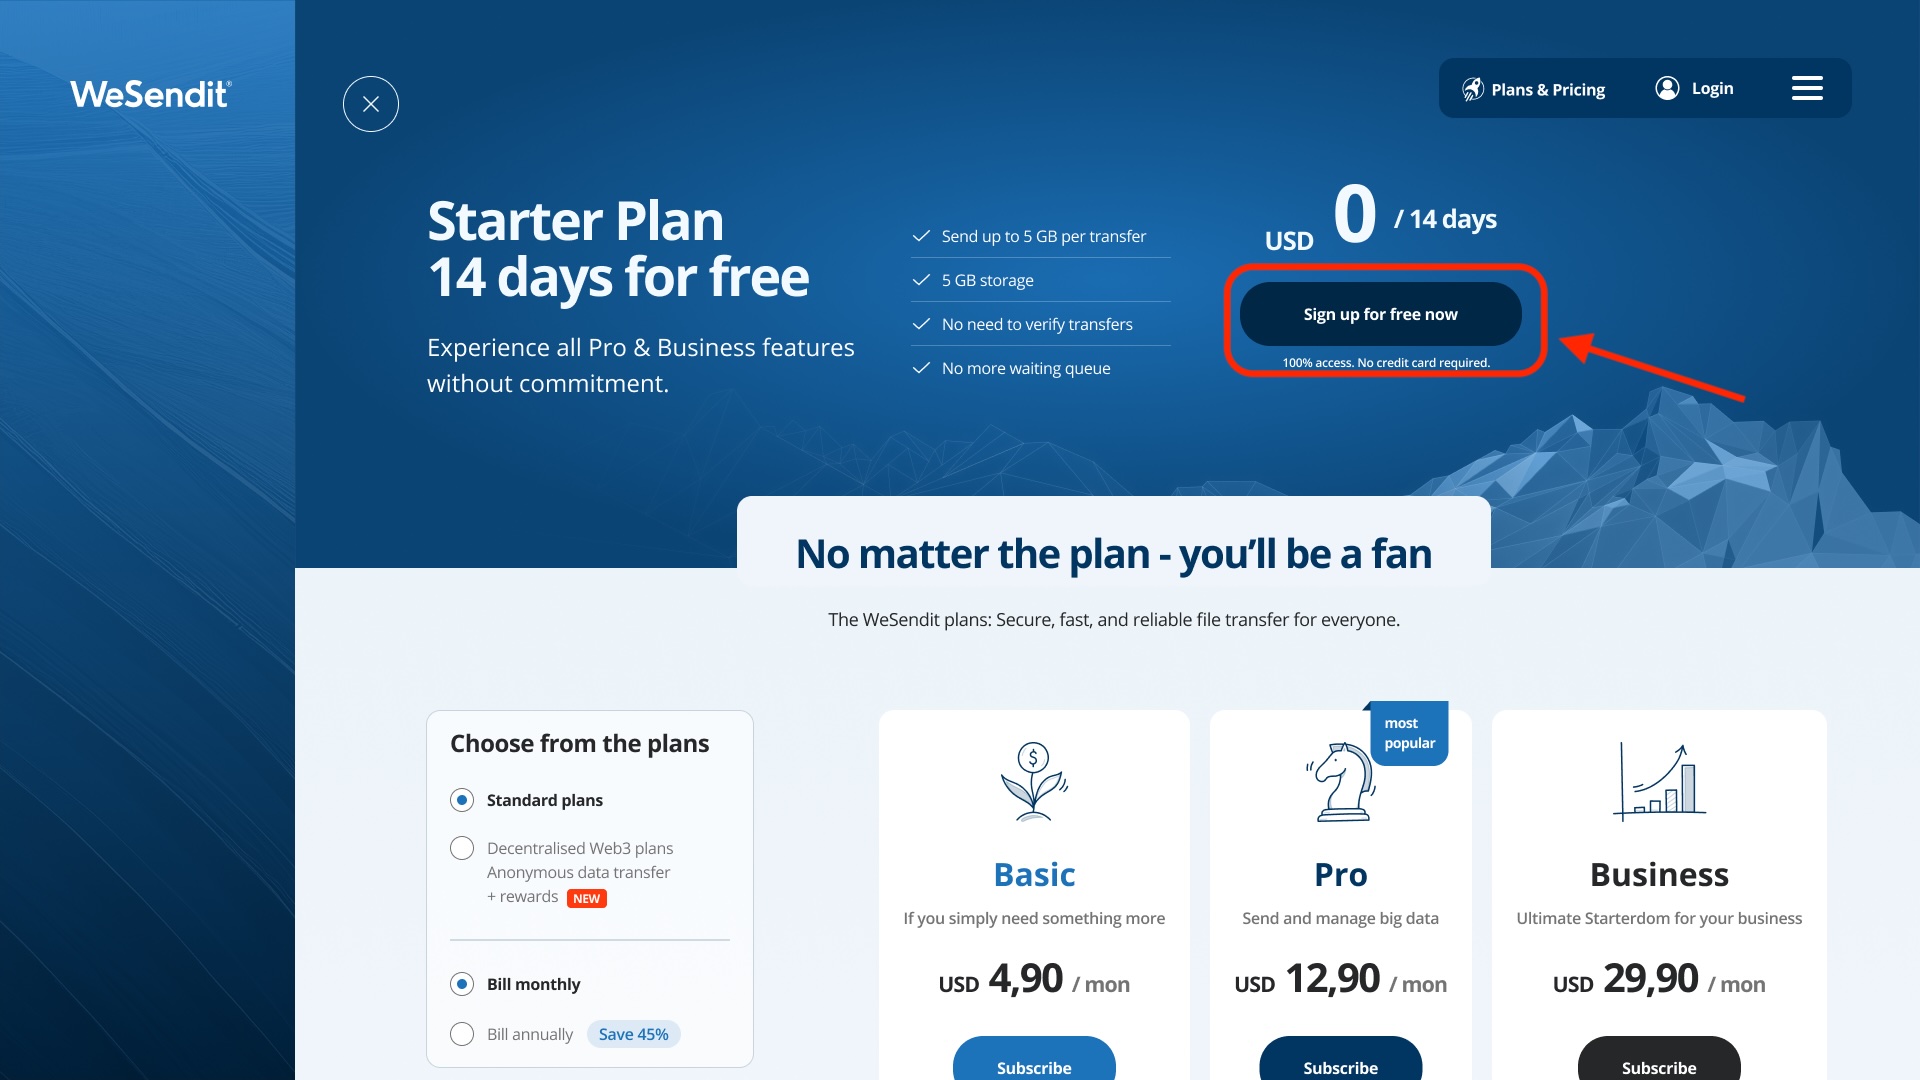
1. Choose the Starter Plan Navigate to the "Pricing" section on our website. Make sure the tab for Standard Plans (Web 2.0) is activated. Click the button in the "Starter" column to begin.
2. Fill out the Registration Form You will be redirected to the "Sign up" page. Enter your details here:
- Email Address: Use an address you have access to.
- Password: Choose a secure password (min. 8 characters, uppercase/lowercase letters, numbers, special characters).
- Legal: Confirm the Terms of Use and Privacy Policy by checking the box.
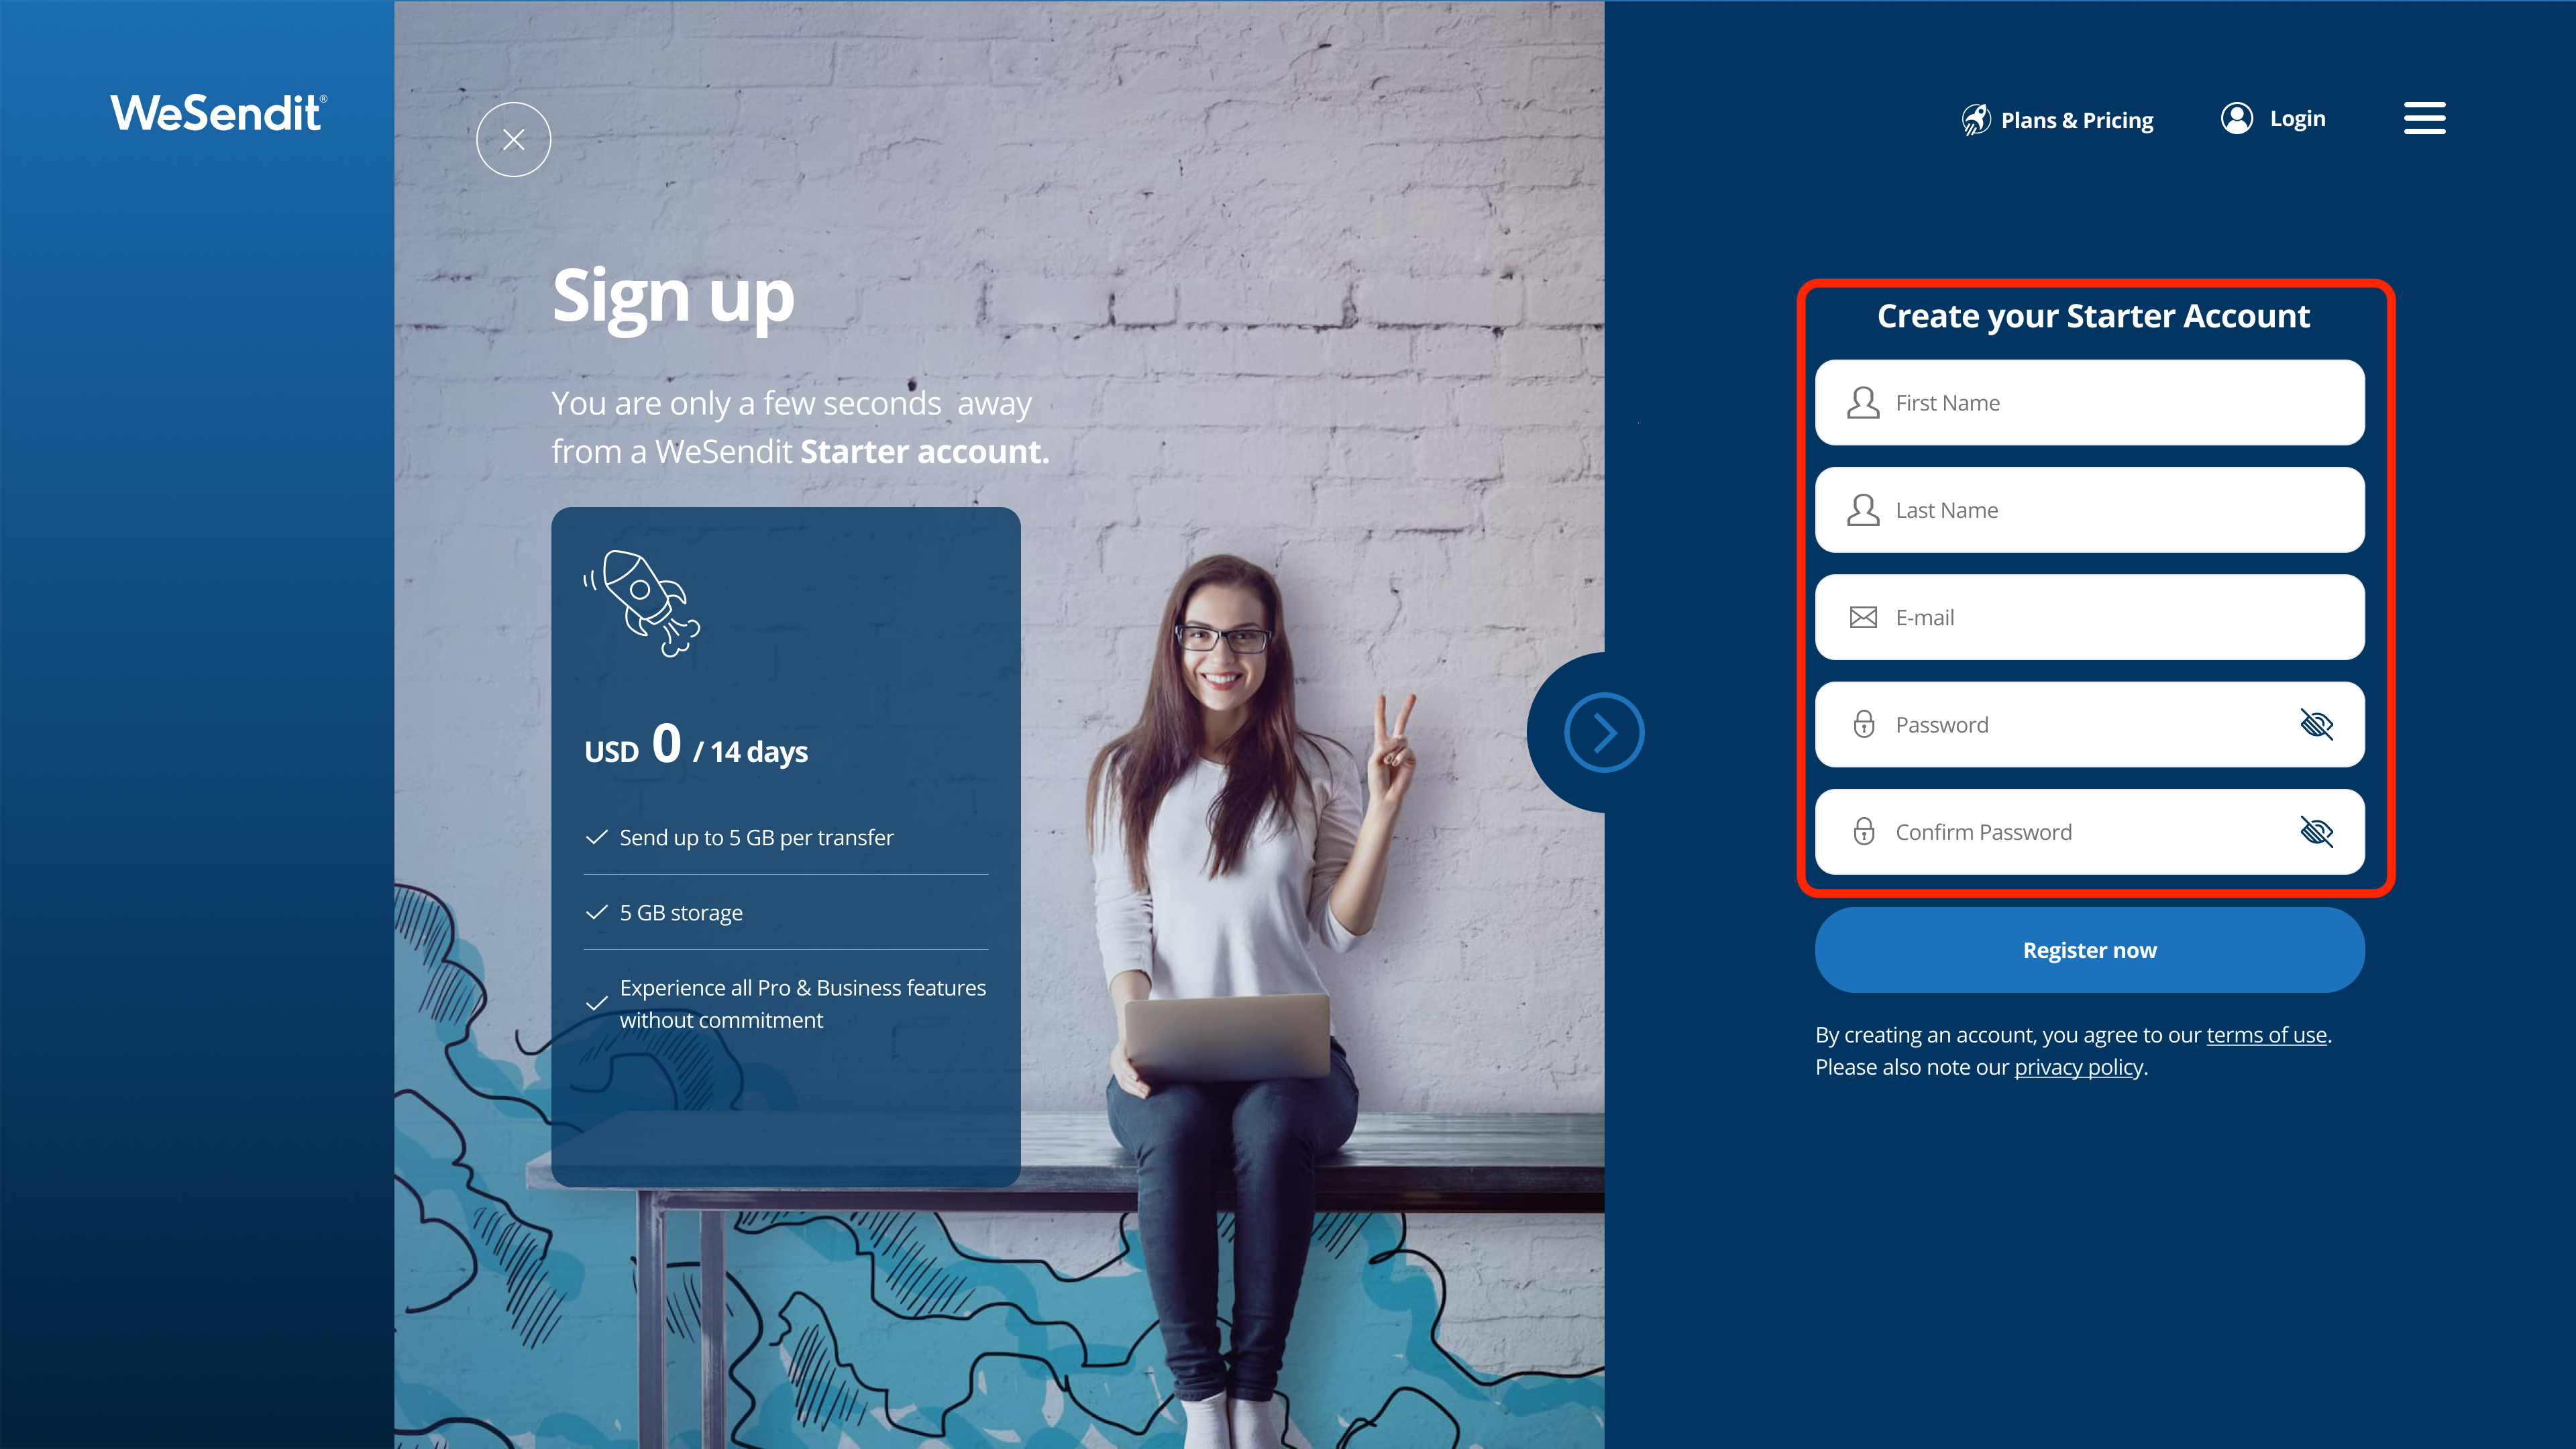
3. Submit Registration Click the "Register now" button.
4. Verify Email We have just sent you a 6-digit code via email (Subject: "Verification Code").
- Open your inbox.
- Copy the code.
- Enter it on the verification page at WeSendit®.
Note: The code is valid for 24 hours.
5. Done! After entering the code, you will automatically be logged into your new dashboard.
How to Upgrade (Basic, Pro & Business)
If you need more storage or the 14-day trial is expiring, you can switch your account to a higher plan at any time.
1. Start Upgrade In your dashboard menu, click on "My Account" and then on the "Upgrade" button. Alternatively, you can find the option directly via the burger menu under "Pricing".
2. Choose Plan and Duration You will now see the overview of plans (Basic, Pro, Business).
- Choose between monthly and yearly payment at the top (Tip: Yearly is often cheaper).
- Click "Upgrade" on your desired plan.
3. Complete Payment Enter your billing details and choose your preferred payment method (Credit Card or PayPal). After clicking "Pay", the new features will be available to you immediately.
Still have questions?
Feeling a bit overwhelmed? That’s completely normal especially in the beginning. If anything remains unclear after browsing our Help Center, don’t hesitate to reach out. Our support team is always here to help you.